Mastering Kotlin 2.4+ SwiftPM (Part 2): Setting Up a Modern KMP Project with AGP 9
How to create a new Kotlin Multiplatform project with AGP 9 and the new KMP default project structure and add support for Swift Package Manager.
AG Mobile Labs•10 min read•
AndroidKMPJetBrainsAndroid StudioIntellij IdeaSwift Package ManagerGradle Plugin
In this article, we'll pick up where we left off in Part 1. We will set up a fresh Kotlin Multiplatform project utilizing AGP 9 and explore the latest default project structure.
Understanding the New Project Structure
JetBrains has introduced a new default project structure for KMP projects to give modules clearer responsibilities, better align with conventions used by other build systems and frameworks, and reflect the changes in Android Gradle Plugin 9.0.
To learn more, you can check this article.
Initializing the KMP Project
To get started, you need to launch Android Studio and make sure the latest version of the Kotlin Multiplatform Plugin is installed. After that, you can create a new project by clicking on File -> New -> New Project -> select Kotlin Multiplatform -> choose iOS and Android and Share UI from UI implementation drop down -> Finish.
For example, here I'm creating a new KMP project named AuroraAi.
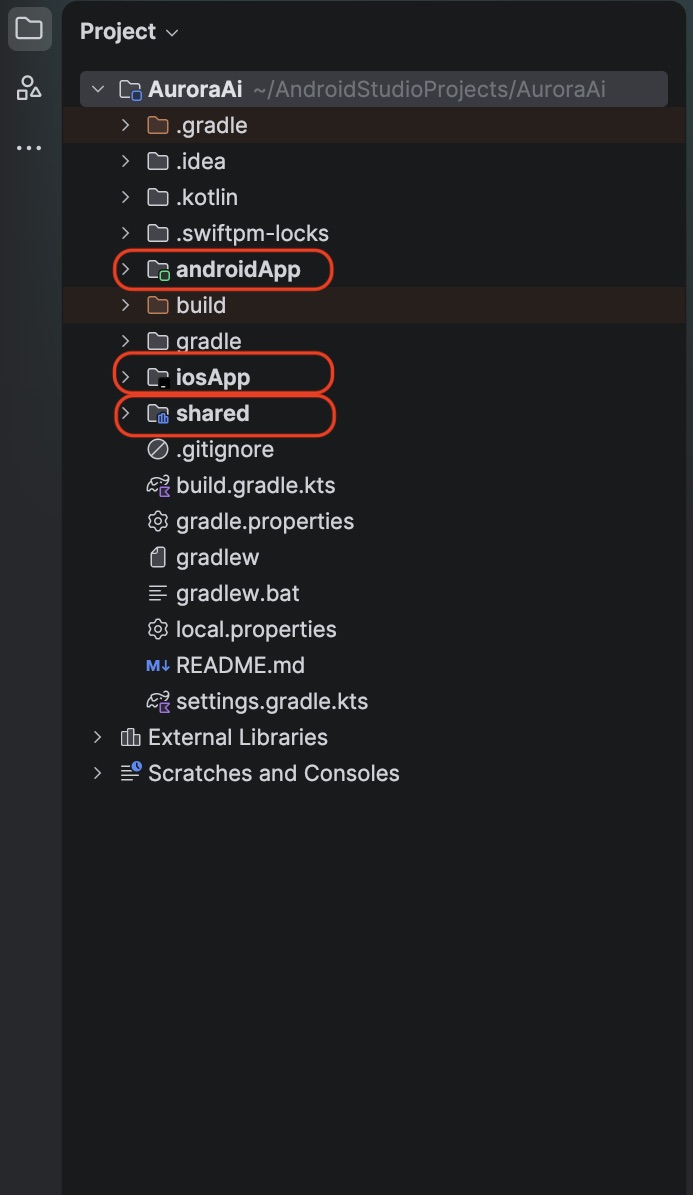
As shown above, the new architecture differs significantly from older templates—most notably, there is no ComposeApp module.
Instead, the template provides a
shared module dedicated exclusively to holding your common Kotlin Multiplatform code. To build runnable applications on top of this shared logic, you now use distinct, platform-specific modules (such as androidApp, desktopApp, or webApp). Because our project specifically targets mobile platforms, you only see the iosApp and androidApp modules.Enabling SwiftPM Support
To support importing Swift Package Manager (SPM) dependencies, your project must use version 2.4.0 or higher of the Kotlin Multiplatform Gradle plugin. Fortunately, this version is included by default when using the new AGP 9 project structure.
You can verify this by checking the
kotlin-multiplatform plugin version in your root gradle/libs.versions.toml file.[versions]
kotlin = "2.4.20" # Make sure this version is 2.4.0 or higher
[libraries]
# Other dependencies...
[plugins]
kotlin-multiplatform = { id = "org.jetbrains.kotlin.multiplatform", version.ref = "kotlin" }To authenticate users on both Android and iOS, we will integrate Firebase Authentication. Because an official KMP Firebase library doesn't exist, we must rely on the native SDKs for each platform. For the iOS side, we will leverage the Swift Package Manager (SPM) integration to import the Firebase SDK. This allows us to call the native Firebase Auth code directly from our
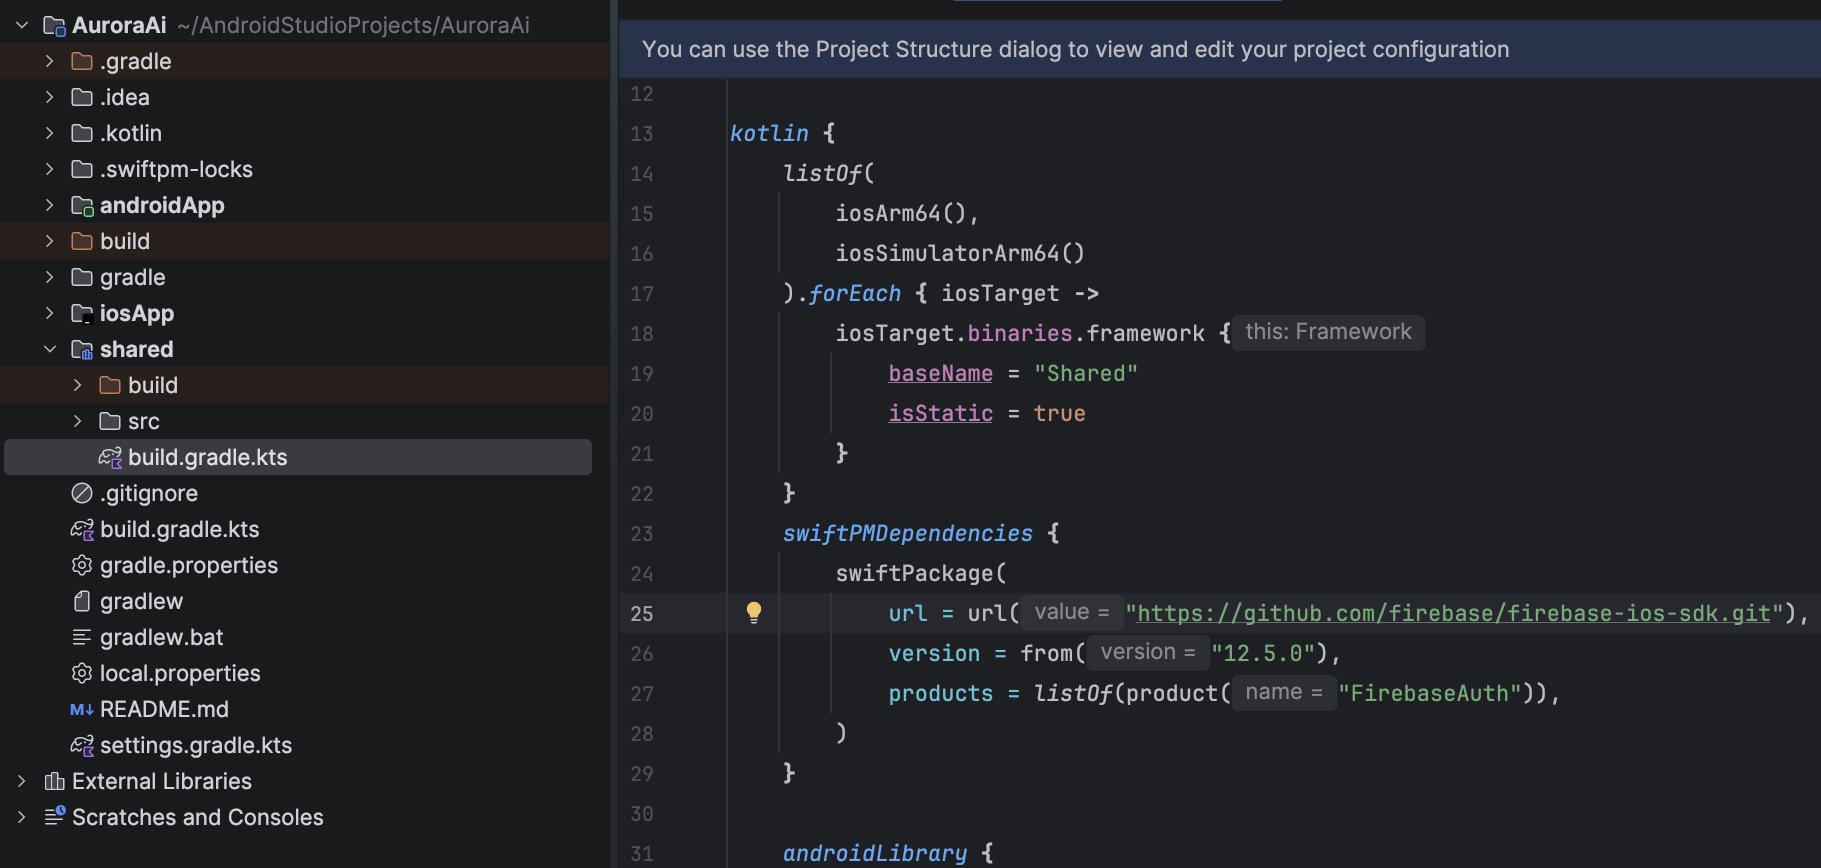
iosMain source set simply by declaring the dependency in the swiftPMDependencies block of our shared/build.gradle.kts file.// shared/build.gradle.kts
kotlin {
// ...
// Configure Swift Package Manager (SPM) dependencies
swiftPMDependencies {
// Add Firebase Authentication as a Swift Package
// You can find the correct URL in the Firebase documentation
// Or use the 'swiftPackage()' helper for remote packages
swiftPackage(
url = url("https://github.com/firebase/firebase-ios-sdk.git"),
version = from("12.5.0"), // Check the latest version
products = listOf(product("FirebaseAuth")),
)
}
// ...
}
To generate the SwiftPM package and perform the necessary changes in the Xcode project, you should run this command from your terminal:
XCODEPROJ_PATH='/path/to/project/iosApp/iosApp.xcodeproj' ./gradlew :kotlin-library:integrateLinkagePackage.Now you can sync the Gradle project, but the build will fail because we haven't configured Firebase yet.
Configuring Firebase
You should create a new Firebase Project in the Firebase Console.
For Android, you can configure Firebase by following the instructions in the Firebase documentation.
Instead of placing the
google-services.json file in the app/ directory of your Android project, you should place it in the androidApp/ directory. Also, apply the Firebase plugin and add dependencies in the androidApp/build.gradle.kts file.gradle/libs.version.toml
//gradle/libs.version.toml
[versions]
//...
firebaseBom = "34.14.1"
googleServicesPlugin = "4.4.4"

[libraries]
//...
firebase-bom = { group = "com.google.firebase", name = "firebase-bom", version.ref = "firebaseBom" }
firebase-auth = { group = "com.google.firebase", name = "firebase-auth" }

[plugins]
//...
google-services = { id = "com.google.gms.google-services", version.ref = "googleServicesPlugin" }
androidApp/build.gradle.kts
//androidApp/build.gradle.kts
plugins {
    // ...
    alias(libs.plugins.google.services)
}

android {
    // ...
}

dependencies {
    // ...

    // Add Firebase Auth dependency
    implementation(platform(libs.firebase.bom))
    implementation(libs.firebase.auth)
}
This makes Firebase Auth available in the
androidMain source set. but not in the shared:androidMain source set, as expected.
To expose it there we should add firebase dependencies to the shared/androidMain/build.gradle.kts file as well.shared/androidMain/build.gradle.kts
//shared/androidMain/build.gradle.kts
dependencies {
    // ...

    // Add Firebase Auth dependency
    implementation(project.dependencies.platform(libs.firebase.bom))
    implementation(libs.firebase.auth)
}
For iOS, you can configure Firebase by following the instructions in the Firebase documentation.
Make sure to place the
GoogleService-Info.plist file in the iosApp/ directory alongside the Info.plist file.What's Next?
Firebase Auth should be configured successfully on the project and accessible through our
androidMain and iosMain source sets.
In the next article, we will walk through Initializing firebase in android and ios apps and implementing the complete authentication flow.💬Comments
Loading comments...
Enjoyed this article?
Subscribe to my newsletter to get the latest articles on Android architecture, KMP, and mobile engineering straight to your inbox.